"The different types of manicure equipment and their use"
Glossaire
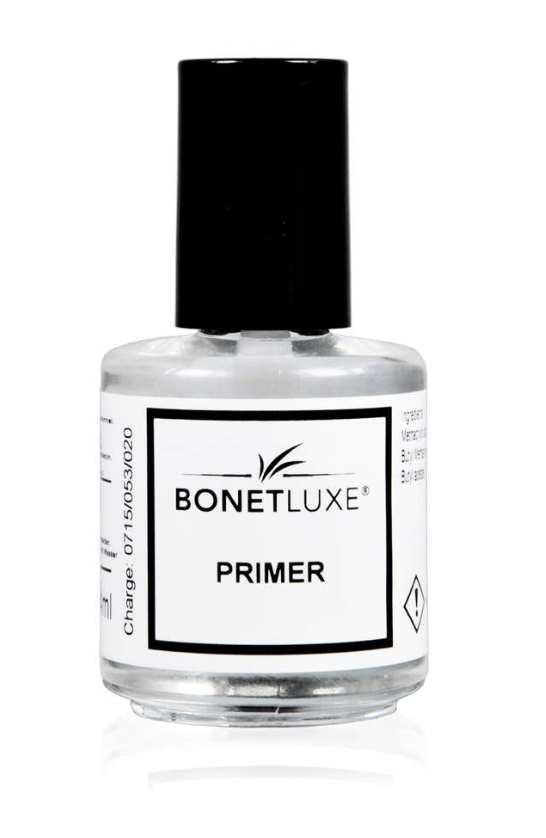
Primer
Do you want to do your semi-permanent manicure or gel application at home? To do so, you need professional products in order to obtain a result that meets your expectations! Semi-permanent nail polish, UV or LED gel, nail files, you have them all but do you know the primer ?
What is it ?
The primer is a product reserved for semi-permanent manicure, whether it is in varnish or gel. It is a product to be used with great care because of its acidic formulation which can burn if applied to the skin.
The nail primer improves the adhesion of the products to your nails in order to extend the life of your semi-permanent manicure.
There is now an alternative to the acid formulation of the primer. Bonder is a similar product that does not contain acid but also improves the hold of your semi-permanent manicures.
How to apply the nail primer?
The application of this product is very delicate and is done before applying your semi-permanent manicure. It is therefore essential to follow the protocol to the letter.
On clean and make-up-free nails, push back your cuticles with a nail polish remover
Prepare your nail with a white block
Apply the primer in a thin layer, avoiding the skin and cuticles
Leave to dry in the open air
If you have sensitive nails, choose the bonder which will be less aggressive thanks to its acid-free formulation.
What is the difference between primer and base?
The UV or LED base allows to protect the nail from the pigments of the semi-permanent varnish. It is therefore essential in a semi-permanent nail polish application. You cannot replace this step by the application of a primer because they are two completely different products.
If you want to save time and no longer have to apply a base coat before applying a varnish, you can opt for the 3in1 semi-permanent varnishes which relieve you of the base coat and top coat application steps.
The base coat is therefore compulsory for a semi-permanent manicure, whereas the primer is optional and allows you to improve the adhesion of the base coat to your nail to improve the durability of your manicure.
WHAT IS A TOP COAT USED FOR?
We often hear about Top Coat, but this is a product that we don’t necessarily know much about. What is it, what exists and how to use it… are all questions that may seem vague. To help you understand the subject and to give you the best possible and long-lasting manicure, we tell you all about the Top Coat.
What is a Top Coat?
The Top Coat is the final touch to your manicure. Whether you prefer natural nail make-up or coloured nail polish, the Top Coat will perfect the look of your nails.
With its ultra-fluid, transparent texture, the Top Coat is applied over your nail polish to both care for your nails with the Silicon Top Coat and enhance them.
The Top Coat improves nail polish hold, provides intense shine, and reveals all the depth and intensity of its shade. The thin layer that it deposits on your nails protects the nail polish from the little bumps and knocks of everyday life and prolongs its life.
The Top Coat can be reapplied a few days after your nail polish application to give it back its shine.
It is the last indispensable layer for an intense manicure that lasts over time.
Top Coat for trendy or playful effects!
Traditionally transparent and shiny, the Top Coat can sometimes take on different effects to transform the look of your nail polish. The Top Coat can thus dress your nails with a matte veil for an ultra-trendy finish, very elegant pearlescent, or to bring a bit of fantasy to your bare or made-up nails with glitter Top Coats such as the Perfection Nail Art Varnishes.
You may also want to change your nail polish without having the time to redo your entire manicure. In one brushstroke, the effect Top Coat transforms the look of your nail polish for a brand new manicure.
And how do you apply a Top Coat?
Nothing could be easier! The Top Coat is applied to your dry nail polish like a traditional nail polish. One coat is enough and its fluid texture makes it very easy to apply without marking the nail polish.
Do not hesitate to reapply a coat every 1 or 2 days to revive the colour of your nail polish or to modify its appearance at will with the matte, frosted or glittery effect Top Coat.
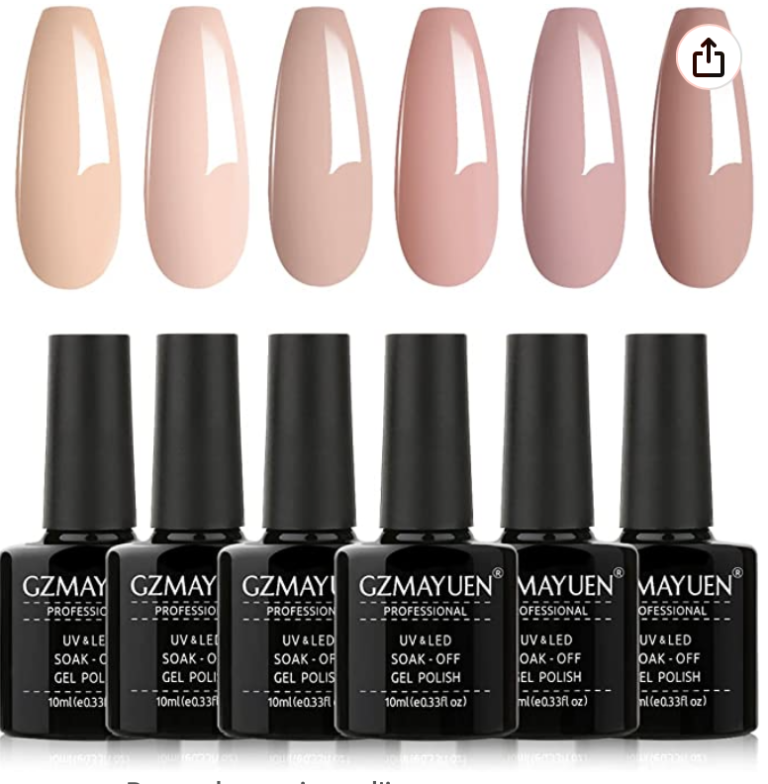
What is gel varnish?
A nail polish that does not flake and remains shiny until it is applied, that is the promise of gel nail polish. How is this possible? Spotlight on this innovative nail polish.
A nail polish that promises not to move for a fortnight, we’re obviously interested! This is what gel nail polish promises, a newcomer to the manicure market. But then, how can this nail polish last so long against all odds without chipping? What makes it different from a classic nail polish? How do you apply and remove it? Does it require maintenance? An overview of gel nail polish.
What is a gel varnish?
Also known as permanent varnish, UV varnish or hybrid varnish, gel varnish is more of a gel than a varnish. It is an acrylic polymer material to which colour pigments are added. This gel nail polish is generally a little thicker than a classic nail polish and only dries under a UV lamp in order to quickly fix the material and obtain this incomparable hold. Depending on the brand, the formulas of gel nail polish can vary significantly (viscosity, shade…). You can also find what is known as soak-off gel, thicker and packaged in a jar. Almost identical, the colour gel will be even thicker and more resistant. You can also find « effect » gel nail polish which dries in the open air without a UV lamp, but which is less durable than gel nail polish.
How is gel nail polish applied?
Gel nail polish is generally applied in a beauty salon, but you can also apply it at home, provided of course that you have a UV lamp at your disposal. It is applied in the same way as a classic lacquer after having done the basics of a manicure, in other words, you must lightly file the surface of the natural nail to allow the gel to adhere correctly, push back the cuticles and dust off the dust before applying the gel varnish. This consists of a base coat, one or two coats of nail polish and a coat of top coat (finish). Between each of these coats, you will have to pass your hand under the UV lamp. Be careful not to touch the cuticles and surrounding skin with the gel varnish, and if this happens, remove the varnish immediately with a wooden stick, before catalysis. Before the top coat, you can let your creativity run wild with nail art designs.
How does gel nail polish work?
The basic requirement for wearing gel nail polish is that your nails are healthy. They must not be dull, split, soft or thin, otherwise the product may damage them even more, especially since the surface must be filed down before application. That said, gel varnish is significantly less aggressive than UV gel or resin. For the application of permanent varnish, there is no need to go back to a specialist. If you start to get tired of the colour or if the growth is too noticeable, you can easily do the removal at home. Simply place a cotton pad soaked in nail polish remover with acetone on the nail and wrap it in aluminium foil for about 15 minutes (the application time varies according to the brand and the quality of the nail polish). Once the time is up, scrape off the remaining nail polish and nourish the natural nail.
Where can I find gel nail polish?
If you have your manicure and gel nail polish done at a salon, it will cost you between €40 and €70 for a 45-minute session. If you prefer to do it at home, a pot of gel varnish will cost you between €20 and €50, a gel primer and a top coat around €15 each. Of course, don’t forget the UV lamp, from €100 to €400. There are a large number of retailers throughout France, depending on the brand, and you can of course find a wide range of gel varnishes and complete kits on the Internet (check the sources carefully). If you are not yet ready to take the plunge into gel nail polish, many brands are coming out with very resistant lacquer nail polishes.

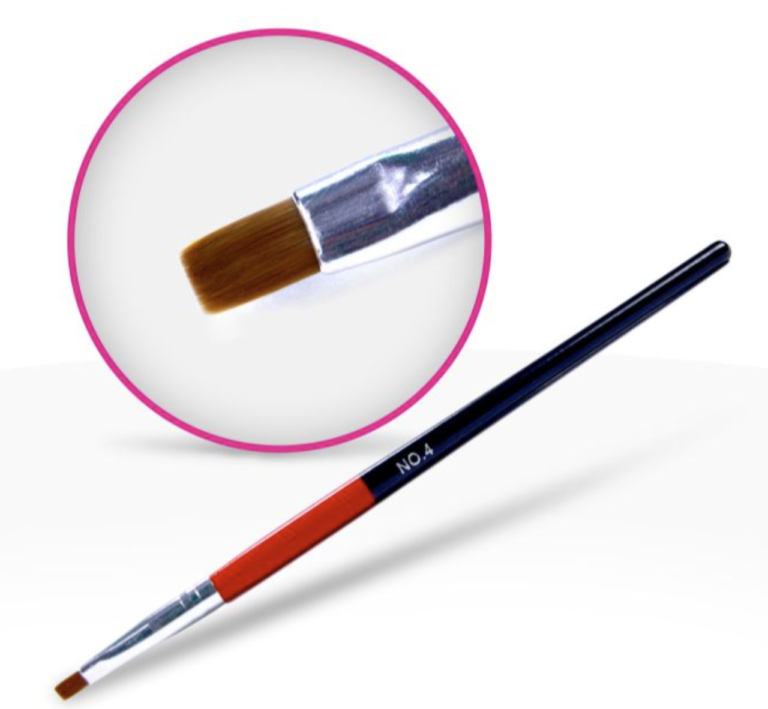
Gel Brush Size 4 Straight
– High Quality
– Size 4 Straight
– Wooden Handle
– Synthetic Nylon Bristles
This size 4 straight brush allows you to apply the gel to the entire nail.
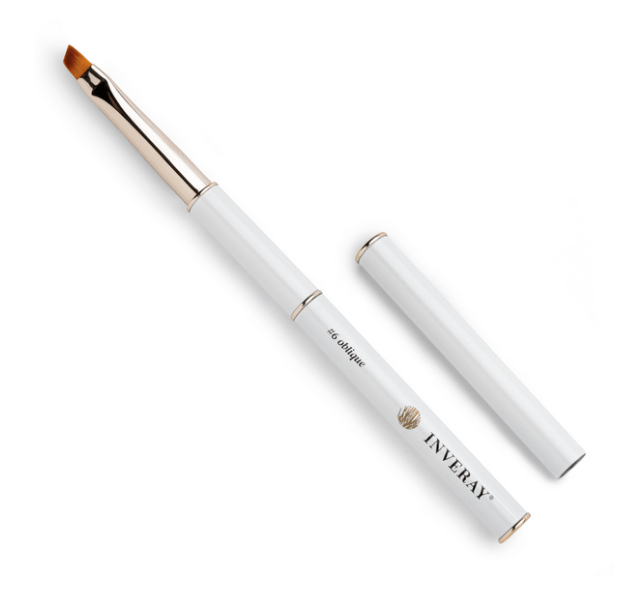
oblique brush N°6
A professional brush that is used to extend and build nails using the gel method. The perfectly contoured oblique shape of the synthetic bristles allows for precise application of the gel. The optimised, comfortable length and thickness of the handle allows easy application and working with the product. The brush has a cap that offers additional protection against dust and dirt.
Bristle length: approx. 7 mm
Bristle thickness: approx. 5 mm
Handle length: approx. 150 mm
dusting brush
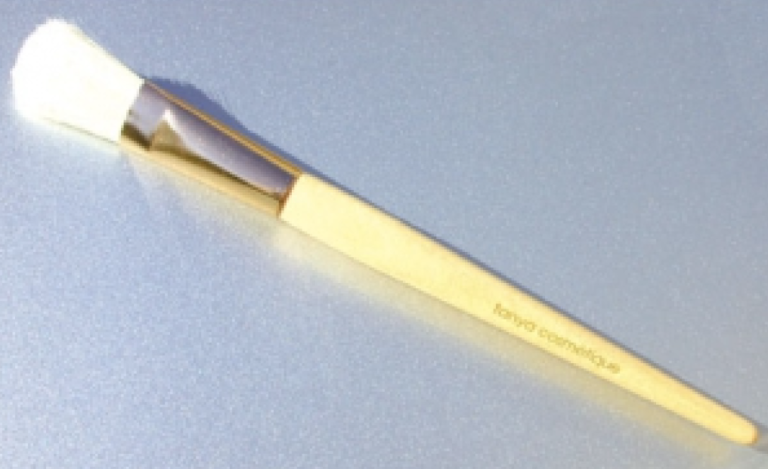
Dusting brush
Dust brush, its stiff bristles and size remove a maximum of dust for a clean and healthy base
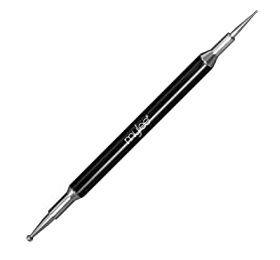
dotting tool
Nail art has not finished surprising us. Ever more inventive, ever more creative, nail art, this true art that comes straight from Asia, knows no limits. From stones to glitter, including stickers and marbled textures, the possibilities for decoration are endless.
Nail art requires certain techniques, and above all certain tools. And one of these indispensable tools, apart from brushes, varnishes and nail patches, is the dotting tool. In French, it could be translated as « outil de pointage », or pointer. But what is it? And how to use it?
Answers now.
Using the dotting tools stitches
The most obvious use of the dotting tool is to use it to make dots. Dots come and go with the times. For a rather wise, retro look, treat yourself to dotted nails. You can vary the size and colour of your nails. The more polish you put on your dotting tool and the more you press, the larger your polka dots will be.
You can play as much as you want:
First you have to wait until the coloured base coat is completely dry before you can continue. This takes about 10 minutes.
Then you put a drop of coloured nail polish on the palette, dip the end of the dotting tool in it, depending on the desired size of the dots, and then put the drop of nail polish on the nail.
When the dots are dry, apply the top coat.
You can have fun making a few dots of a single colour, or take a single shade in different shades, for example dark to light nail polishes, and then create a gradient of dots.
If your nails are small, be careful not to overload them.
With the same technique, you can also draw flowers, using different coloured nail polishes. What is very pretty is to superimpose them.
Marbled effect
You can also use the dotting tool to create a marbled effect:
Apply your two coats of base coat. Do not wait for them to dry, otherwise the nail polish will become mushy.
Immediately apply a vertical strip of a darker colour varnish.
For a classic marble, for example, you can use a white base coat, then draw a black stripe, then use your dotting tool to make zigzags, so that the two colours blend.
For an even richer gradient, apply a second stripe of a second shade, silver for example, to the side of your nail, then use your dotting tool to blend the three shades.
But you can also vary the shades and create even more playful marbling. It’s up to you!
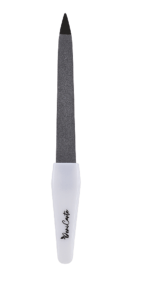
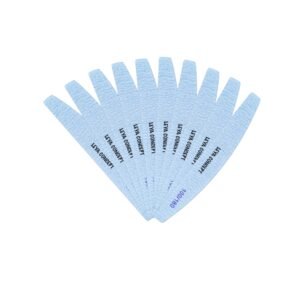
Nail file

The softness of disposable cardboard files
Until now I thought that whatever nail file I chose, as long as it filed my nails it would do the job well… well I was wrong!
There are indeed several types of nail files with more or less good effects for our nails and with more or less different actions.
The softness of disposable cardboard files
Until now I thought that whatever nail file I chose, as long as it filed my nails it would do the job well… well I was wrong!
There are indeed several types of nail files with more or less good effects for our nails and with more or less different actions.
The softness of disposable cardboard files
You will probably find that there are many different types of file on the shelves of your nail salon/cosmetic salon. The higher the number, the harder the file:
80/80 and 100/100: « hard grit » files used for false nails and for rubbing off the top coat when applying SP polish (see the « application » article). Avoid filing your natural nails with « hard grain » files as this will damage them.
150/150: « Medium grain » files: for natural nails.
180/180: « Soft » or « Fine » files, also for natural nails.
There are also two-sided files: 100/80 or 100/150, with different grits on each side.
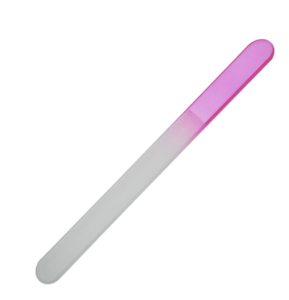
The softness and fragility of glass files
This file has a rough surface and lasts a very long time if you take care of it, don’t put it in your bag and be careful not to drop it. It remains the softest for our nails but is often unpleasant for its user who undergoes some kind of « vibrations ».
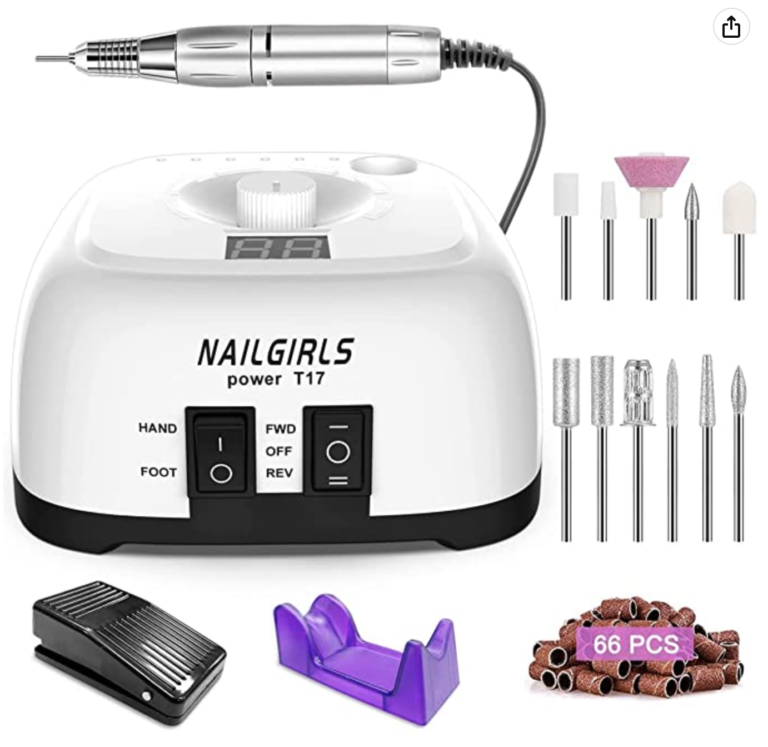
The functions of electric files
They have several functions, in particular that of polishing the nails because they are provided with several tips. Here again, care must be taken because if you polish your nails too much, you will weaken them and if used incorrectly, electric files can damage your nails.
The softness of disposable cardboard files
You will probably find that there are many different types of files on the shelves of your nail salon/cosmetic shop. The higher the number, the harder the file:
80/80 and 100/100: « hard grit » files that are used on false nails and to rub the top coat when applying SP nail polish (see article « applying »). Avoid filing your natural nails with « hard grain » files as this will damage them.
150/150: « medium grain » files: for natural nails.
180/180: « Soft » or « Fine » files, also for natural nails.
There are also two-sided files: 100/80 or 100/150, with different grits on each side.
The best way to file
To file your nails in the best possible way, i.e. most efficiently without damaging them, there are a few rules to follow. Start with the sides of your nail to give it the shape you want (rounded or square) and then go towards the tip of the nail.
Be careful not to file too often and not to go back and forth, you should always file your nail in the same direction.
polishing block
The nail polisher is an indispensable tool for perfecting your manicure, especially for those who do not wear polish often. With its many sides, it offers more possibilities than the nail file to take care of your nails and give them the desired shape and shine. Find out how to use a nail polisher and how to choose the right one.
What is the purpose of the nail polisher?
The nail polisher is one of the most popular accessories for manicure beautists because it allows to polish the surface of the nails gently, without damaging them, which a nail file cannot do.
The polisher comes in the form of a rectangular block with 2 or 4 sides. Each side has a different grit, so it is a complete tool for filing your nails.
With a nail polisher, you can first roughly remove imperfections from your nail before refining it, giving it the desired shape, and polishing it to make it smoother and shinier.
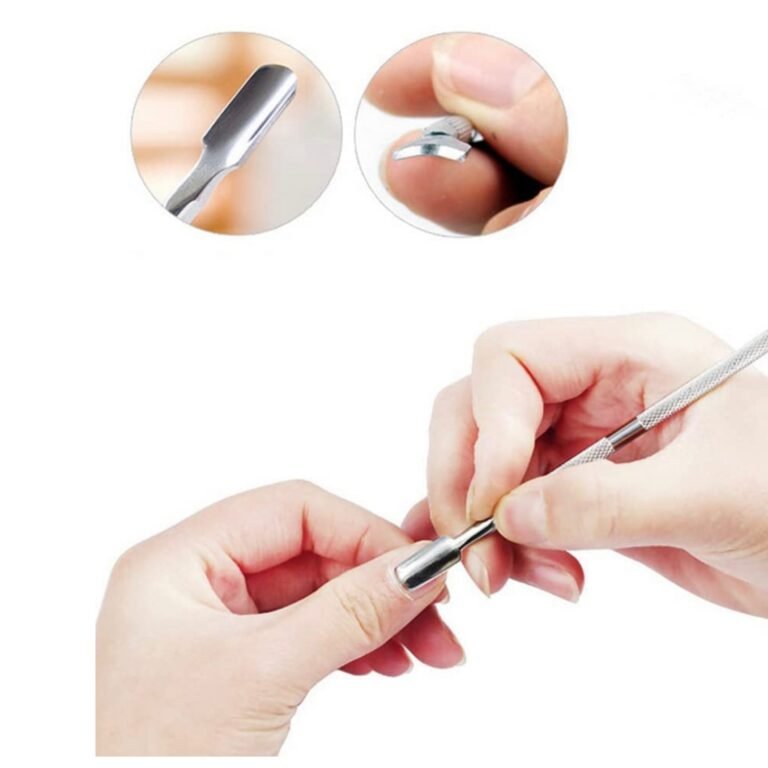
Boxwood stick
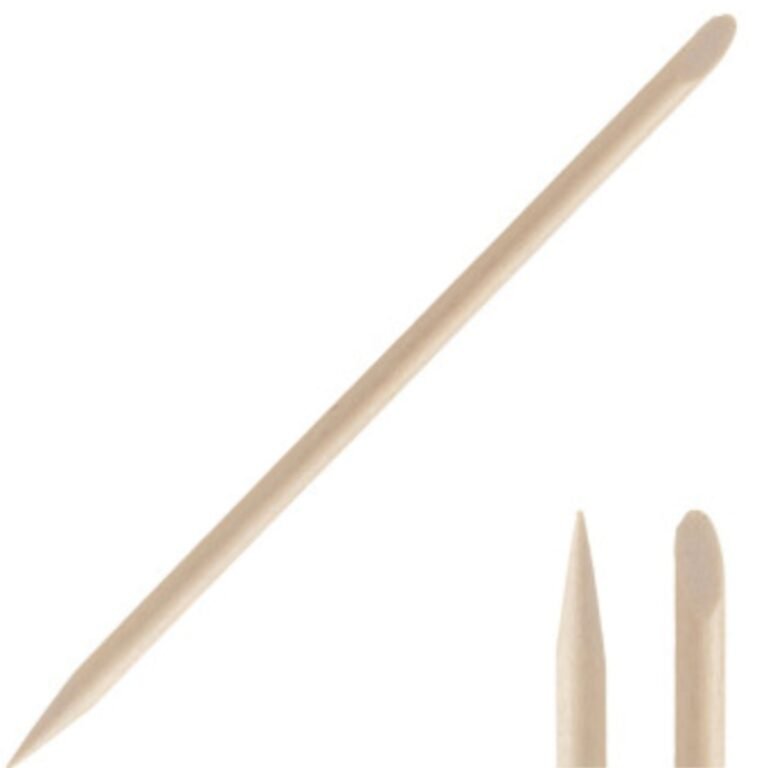
Boxwood stick / Rose stick
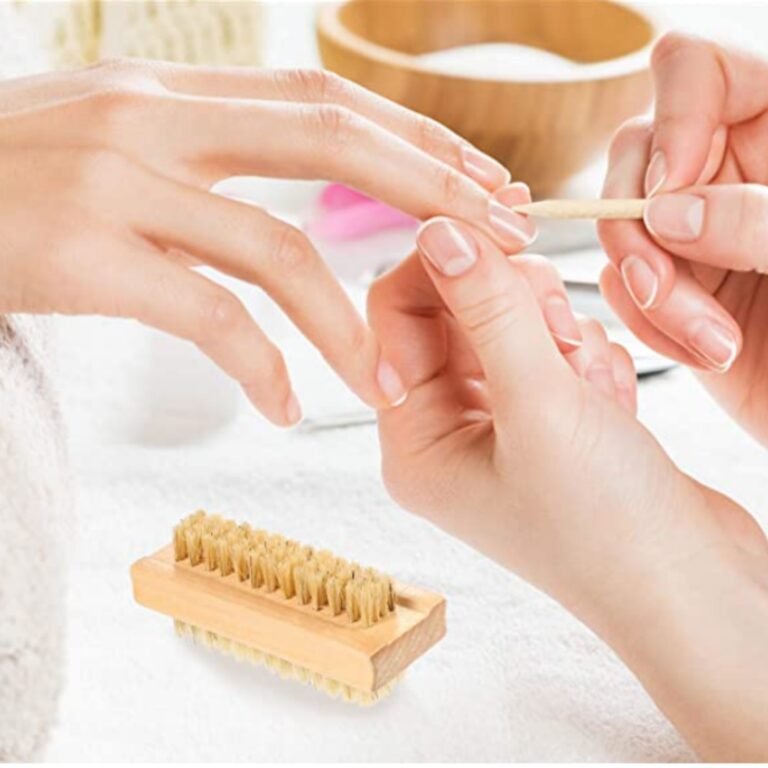
The boxwood stick is used to gently push back the small skins around the nail and the cuticles to have a clean and clear base.
Useful during a manicure or the application of false nails in gel or resin.
Ideal for removing excess gel, acrylic resin residues, cleaning the free edge of the nail…
– Versatile tool
– Two different ends (one wide and flat to push back the skins – one pointed to « scrape »)
– Length : 11,2cm
– Single use for perfect hygiene.
cuticle growth
The right cuticle remover tool
To push back this elastic membrane of skin on the nail, it is better to choose a wooden cuticle pusher if the skin is supple, or a metal one if it is hard and resistant (as on the feet for example).
You’ve got it right, haven’t you? For a perfect nail beauty, cuticles are the crucial and yet underestimated elements. To get a bigger, more beautiful nail, more suitable for nail polish application… You must take care of your cuticles (or call in a professional manicurist). Zoom on the technique to learn how to grow your cuticles properly. Here we go!
How to grow cuticles yourself?
Yes, you want those elegant and feminine hands, don’t you?
You’ve tried everything: hand care for moisturized skin, a base to strengthen the natural nail, colored polish to enhance the hand… In short, you want to achieve an exceptional manicure at all costs.
But did you know that cuticles can change everything?
Indeed, by taking care of your cuticles, your nails will look longer, finer and more beautiful. Let’s see how to take care of your cuticles. But first of all, a few details are necessary.
What are cuticles?
Let’s go back to the basics. What are cuticles (of the nails)?
A cuticle is a kind of junction that connects the skin and the nails, either on the hands or the feet. Cuticles therefore grow in the same way as hair or skin regenerates.
The cuticle is actually a layer of cornea, epidermis and water. It develops in the form of a transparent plate which is placed on the base of the nail. It protects the root of the nail. This is why it is not advisable to cut and remove the cuticle, pushing it away is more than enough.
Cutting pliers
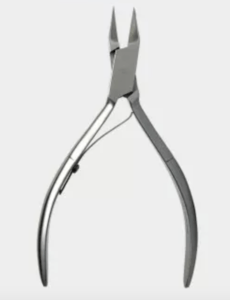
The Nail Nipper
An essential tool for a good manicure, nail nippers are found in all nail professionals. It allows the maintenance of the nails of the hands and feet without weakening them. And it is effective even on thick nails! Of course, you need the right technique to use it and find the model of nipper that suits you.
WHICH NAIL CLIPPERS TO CHOOSE?
First of all, nail clippers should be made of stainless steel. This makes it resistant to thick nails. And it’s easy to clean, because it can be rinsed off. In addition, they will not rust and will last you a long time.
You can find different sizes for sale. Smaller sizes for children, a medium size for everyone and a large size for people with big hands, or for professionals. Choose the one that is easiest for you to hold.
Secondly, there are several choices of tips for these pliers. Slanted tips, which cut straight and avoid ingrown nails by leaving the corners of the nails long enough. Tapered tips, to deal with ingrown nails. The flat ones give a straight cut. And the concave ones that follow the natural shape of the nails. These are the easiest to use.
HOW MUCH AND WHERE CAN I FIND NIPPERS?
For the simplest models, expect to pay between 15€ and 30€. These models are sold in supermarkets, pharmacies and parapharmacies.
For « ergonomic » models intended for professionals, prices can go up to 50€. These models have silicone temples for a better grip. You can find them in specialised shops or on the internet.
Don’t hesitate to have a look at my selection of manicure cutlery kits that have quality stainless steel nail clippers!
HOW TO USE NIPPERS CORRECTLY?
To avoid ingrown toenails, toenails must be cut straight. The sides of the nails should form a right angle. For fingernails, it is important to divide the nail in three to avoid weakening it.
So cut 1/3 on the side, then 1/3 on the other side and finally the centre. Don’t do the whole nail in one go! And leave a little length, about 1 millimetre of white at the end. Don’t go flush with the nail to avoid any injury and to ensure good hygiene.
For more comfort during cutting, you can press the centre of the nail, so you won’t feel anything. After cutting your nails, you can file them (file or electric sander) to give them the shape you want. But also to prevent your nails from catching on clothes for example. Once finished, you can wash your nail clippers with soap and even sterilise them if necessary.
Nail clippers are recommended by chiropodists, as they are best used to prevent damage to the nails. They are essential for good nail care and can be used to shorten all types of nails. So you will find a place for them in your toilet bag, next to a nail file for example.
cleaner 1 litre
Cleaner, remover or dissolver: what are their roles and when should they be applied?
The Cleaner
The Cleaner is a colourless liquid; essential for semi-permanent manicures! It has two very specific functions: to clean and degrease your nails. Otherwise known as a « degreaser », the cleaner allows you to clean your nails after preparing them for a semi-permanent manicure. It can be said that it purifies the nail because it quickly eliminates dust and other residues. Also, this product removes the thin sticky film that semi-permanent nail polish can sometimes leave on the nails. Without the cleaner you can have the strange feeling that your nail polish is not completely dry!
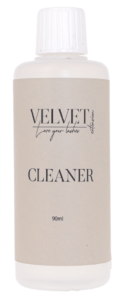
How is the cleaner applied?
We pour the liquid on a square of cellulose and apply it to our nails. You can find Cleaner in bottles (100 ml and 500 ml) or small pads already impregnated with cleaner on the Méanail Paris shop. The latter are made up of a square of cellulose pre-soaked in the cleaner.
Nail polish remover
Nail polish remover is a must for a classic manicure. It allows you to remove classic nail polish. Very effective for nail polish but very smelly! To handle this little bottle, you need to have cotton pads, cotton buds and a small brush. However, there are now some quicker and more ecological alternatives. For semi-permanent, we won’t talk about nail polish remover but about Remover! The nail varnish remover has only to behave itself, we are not jealous here.
Comment retirer son vernis ?
Pour retirer ton vernis à ongles semi-permanent comme une professionnelle, voici quelques étapes à respecter :
Ponce tes ongles légèrement pour retirer le top coat et permettre au remover de pénétrer la/les couche(s) de couleur.
Deux options s’offrent à toi :
– Découper au préalable des petits carrés de cellulose ; les imbiber de remover et fixer le tout autour de tes doigts pendant environ 15 minutes.
– Te procurer des pads déjà imprégnés de remover et faire comme des papillotes autour de tes doigts. Attendre environ 15 minutes. Pour faciliter la dépose de ton vernis à ongle semi-permanent, munis-toi de pinces spécialement conçues pour la dépose.Pour enlever les résidus de vernis ou de gel, ponce légèrement tes ongles avec le bloc polissoir ou avec une ponceuse électrique.
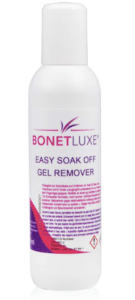
The Remover
The remover is a colourless liquid that is essential for removing semi-permanent nail polish. Contrary to the Cleaner, which does not require
pas ou très peu de matériel, le remover est quant à lui, inscrit dans un vrai processus : celui la « dépose ». On t’explique : pour retirer ton vernis semi-permanent, certaines étapes sont importantes.
1 acétone, 500 ml
Acetone is a compound used as a solvent. It is found in some nail polish removers. Effective for removing nail polish, it is said to weaken the nail.
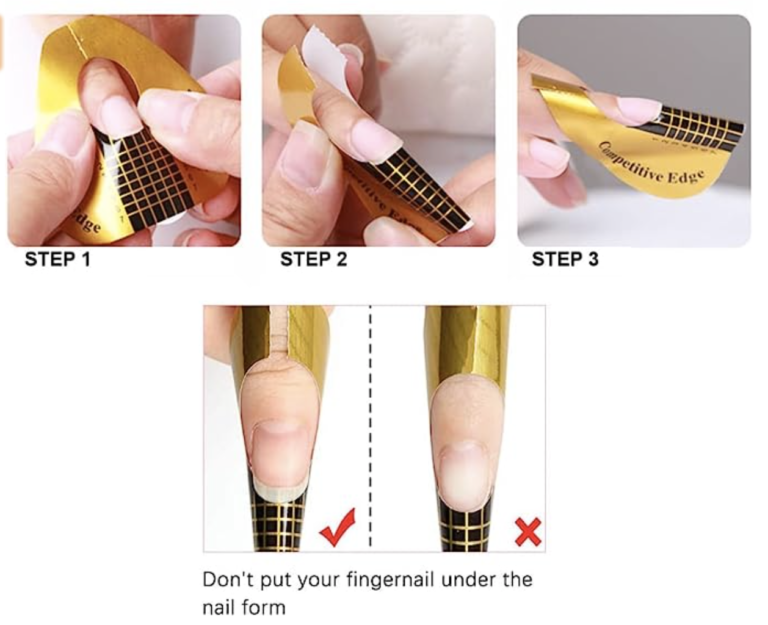
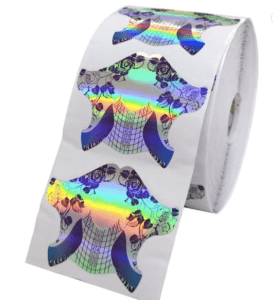
chablons

The chablon is a paper form, which acts as a pattern for the nails. It is double-sided, one side of which the nail technician sticks under the free edge of the natural nail. It serves as a guide, following the shape of the nail perfectly in order to shape the gel nail for the purpose of an extension.
For slightly thicker fingers, it is better to use this type of wider template to be able to completely wrap the nail.
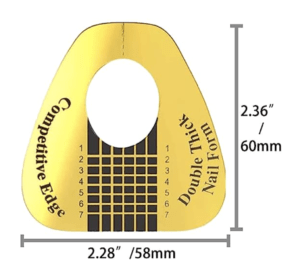
Également le chablon, papillon numérotés qui sont excellent pour sculpter toute forme d’ongle.
- Spécialement pour sculpter les fausses pointes d’ongles stiletto et également idéal pour la fabrication d’ongles en gel d’amande, de cercueil ou de squoval.
- Avec la longueur et les numéros marqués sur chaque forme d’ongle qui fournit un guide précis
The varnish colour chart
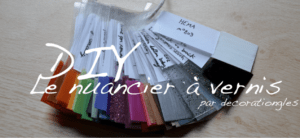
This summer, I made a nail art colour chart! Easy to make, very useful for nail art and simple to use, this new tool is now in my varnish library! If you want to create one too, follow the guide… I’ll first present you my old colour chart, then the steps to create my new colour chart and finally some bloggers who made similar tools and who could inspire you.
My old colour chart
To start with, this is what my old colour chart looked like: three transparent plastic plates on which I put a small touch of each new varnish. I decided to sort them by colour:
– Warm colours: yellow, orange, red, pink, purple
– Cool colours: blue, green, brown, grey, white, black, beige
– Glitter: gold, silver, coloured glitter
My varnish library is still organised in this way, as it contains a varnish house in warm colours and a varnish house in cool colours
Vacuum pump bottle for false nails cleaner

Empty pump bottle for false nail cleaner or nail polish remover. Allows you to use the liquid with one hand: place the cotton pad on the top of the bottle and press to dose the desired quantity.
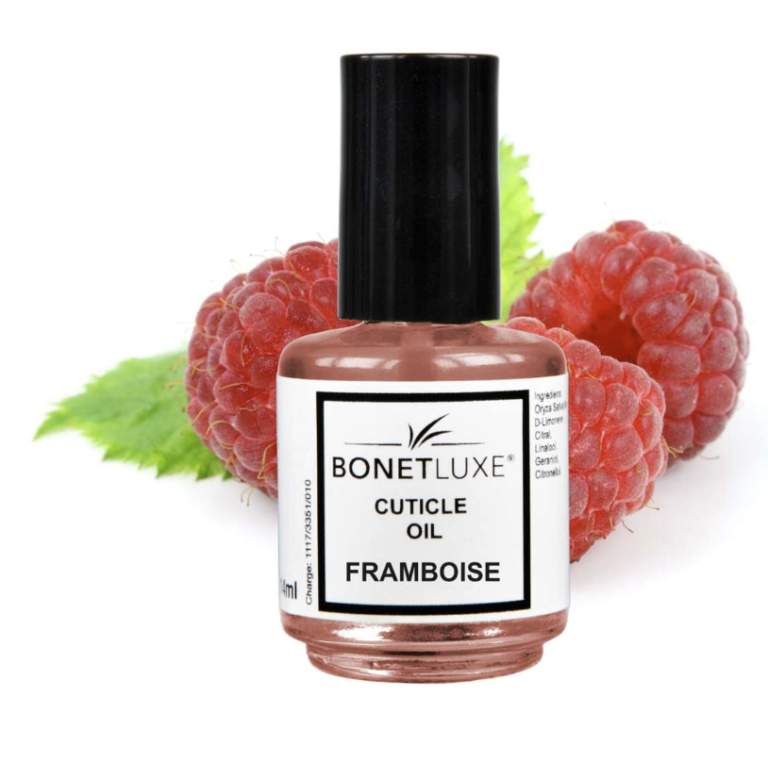
Cuticle oil
Cuticle oil is a must for every woman who wants to keep her hands in good condition. Nail oil moisturises the cuticles and gives your hands a beautiful appearance. In the Mistero Mialno assortment you will find various cuticle oils that repair the cracked skin around the nail plate. All oils have their own fragrance. In this blog we explained why cuticle oil is so important for your cuticles.
1. What is cuticle oil?
Cuticle oil is an oil that nourishes, moisturizes and softens the skin around the nail plate. Cuticle oil has a protective effect on the natural nail. The cuticle is the first barrier that protects the nail matrix. Therefore, the cuticles must always be kept in good condition. When cuticles dry out, they often form loose skins where bacteria can penetrate. This can eventually lead to inflammation at the root of the nail (matrix).
When the cuticles are dehydrated, the oil accelerates the healing of small wounds around the nail plate. Cuticle oil, or sometimes called nail oil, does not affect the condition of the nail plate, but improves the condition of the skin around the nail plate. Cuticle oil cannot therefore heal a cracked or split nail plate.
2. How to use cuticle oil?
Applying cuticle oil is very easy. It is often forgotten that it is best to massage the cuticle oil into the skin. If you don’t, some of the oil will remain on the surface. Apply the oil not only to the cuticles, but also to the hollows of the nail plate. This will also minimise the risk of nail cravings forming.

Apply cuticle oil.
Apply cuticle oil to the skin around the entire nail plate. Mistero Milano’s cuticle oils are equipped with a brush, which makes application easier.

Massage the cuticle oil.
After applying the cuticle oil to each finger, massage the nail plate, cuticles and surrounding skin to ensure that the oil penetrates well.
3. Why use cuticle oil?
Applying cuticle oil will give your hands a neat look after a manicure. It is always more elegant to have healthy skin around the nail plate than broken and dry skin.
As mentioned before, cuticle oil makes the cuticles more supple, which makes it easier for the nail technician to work. The cuticles are softer, which makes it easier and quicker to remove them.
Mistero Milano cuticle oils contain vitamin E. This vitamin does not strengthen the nail, but it protects the nail plate better against dehydration and its consequences. Vitamin E is an antioxidant that helps to protect the keratin of the nail plate against external exposure such as hand sanitizers, cleaners, etc. Many scientific studies show that vitamin E also has a positive effect on the skin. It strengthens the barrier function of the skin and increases the absorption of other active ingredients. Vitamin E has a clearly visible positive effect on dry cuticles.
The benefits of cuticle oil in a nutshell:
Better protection of the nail matrix
A well-groomed appearance of your nails
No problems with dry cuticles or peeling skin
Improved blood circulation under the nail plate
…
4. When and how often should cuticle oil be applied?
Every day, our hands are exposed to external factors that dry out our hands and cuticles. In some cases, the cuticles are even damaged. It is recommended to apply cuticle oil daily. It protects your nails and the skin around them and keeps them in good condition. We recommend applying cuticle oil twice a day. It is best to apply the oil during your daily routine, for example after brushing your teeth. This way you are less likely to forget to apply it.
into the nail plate?
Yes, but not all cuticle oils do this. In fact, only a few types of oils can penetrate the nail plate: jojoba, coconut and avocado oils. The movement of substances through the nail plate is ensured by substances whose chemical structure mimics the natural oils present in the nail plate.
Water is one of the few substances that can move quickly through the nail plate. In fact, water moves faster in the nail plate than in the skin. Oils, on the other hand, move much more slowly through the nail plate. To speed up the process, you can use heated cuticle oil, which will help the oil move more quickly into the nail plate.
According to several studies, vitamin E has a beneficial effect on the microcirculation of your blood. Therefore, it is good that the cuticle oil moves through the nail plate to the nail bed.
6. Will nails grow faster with cuticle oil?
Cuticle oil does not make your nails grow faster, but it does help to protect your nail plate due to the presence of vitamin E. Your nails will only grow with additional vitamins, but normally a healthy diet is sufficient. Vitamins and food supplements are transported by the bloodstream to the matrix that makes up the nail.
7. Mistero Milano cuticle oils
The Mistero Milano range contains five different cuticle oils. All five oils have more or less the same formula. The main difference between the cuticle oils is their smell. You can find more information about the cuticle oils below.
Scented cuticle oils:
Cuticle oils contain sunflower oil, jojoba oil and vitamin E. The ingredients present have a positive effect on the keratin of the nails and the repair of the cracked skin around the nail plate. In addition, vitamin E ensures the rapid healing of small wounds and better microcirculation under the nail plate.
Spa orient cuticle oil:
Spa Orient contains sunflower oil which moisturises the cuticles and has an antioxidant and strengthening effect on the nails. This cuticle oil accelerates the regeneration of cracked cuticles and accelerates the healing of small wounds. The orient spa improves the microcirculation under the nail plate. This cuticle oil has an oriental fragrance.
8. Summary
Cuticle oil can be used at home or in your nail salon. It ensures that your hands look well groomed after a manicure. A good cuticle oil has a positive effect on the keratin of the nail and restores the cracked skin around the nail plate.
Mistero Milano cuticle oils are highly recommended! As mentioned before, they have a positive effect and smell wonderful. Don’t forget that they are a great extra income if you sell them in your nail salon!
Lampe UV/led
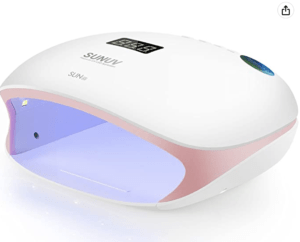
How to choose a manicure lamp?
Avec toutes les nouvelles technologies disponibles sur le marché et les termes professionnels existants, il est parfois difficile de s’en sortir entre les différentes sortes de lampes pour faire durcir son vernis permanent, son gel ou l’acrylgel.
En 4 critères, nous allons vous aider à choisir la bonne lampe de manucure qui vous correspond le mieux !
Critère 1
Le type de lampe
Il existe 3 types de lampes, à choisir en fonction de vos besoins et de votre utilisation:
La lampe UV
La lampe UV utilise des ultraviolets où la longueur d’ondes est mesurée en nanomètre (nm).
Avec ce type de polymérisation vous pourrez catalyser uniquement des produits qui durcissent sous UV et non LED.
Les ampoules UV produisent en moyenne entre 300 et 400 nanomètres et les gels UV ont besoin de 350nm pour durcir entièrement.
Notre recommandation: la lampe UV 36W de Promed
La lampe LED
La lampe LED utilise des ondes électroluminescentes dont la longueur d’onde produite est moins importante que celle des UV. La lampe LED permet de polymériser uniquement des gels qui durcissent sous LED et non UV.
Les gels LED ont besoin de 370 nm et les ampoules LED émettent 380nm.
En ce qui concerne la polymérisation d’un vernis permanent, les lampes UV le durcissent en 2 minutes alors que la lampe LED le fait en 30 secondes.
La lampe 2en1 UV et LED
Un seul appareil qui regroupe les deux technologies ? Il s’agit d’une lampe mixte compatible pour les gels UV et LED.
Ce type de lampe manucure est plus cher à l’achat mais plus rentable à long terme.
Notre recommandation: la lampe UV/LED de Promed
Critère 2
Le Design
Une lampe pour ongle doit être compacte et légère de façon à pouvoir la placer facilement sur votre table de travail. Actuellement, les lampes sont de plus en plus ergonomiques, très performantes et prennent de moins en moins de place.
Veillez à avoir un espace intérieur suffisant pour les 5 doigts, afin d’éviter que les ongles entrent en contact avec les ampoules, ce qui engendrerait des dommages sur la matière que vous venez d’appliquer.
Si vous êtes professionnelle, optez pour un design moderne, vos clientes en seront ravies !
Critère 3
La minuterie et le détecteur
Pour vous assurer un excellent contrôle du temps de séchage des gels ou vernis permanents nous vous conseillons d’opter pour une lampe qui propose différents modes de minuterie et un capteur automatique.
En règle générale, les modes sont de 15s, 30s et 60s pour les lampes LED et UV/LED et 120s,180s pour les lampes UV.
Le détecteur automatique de main vous permet ainsi de rester concentrée sur l’application de votre matière car il suffira à votre cliente de rentrer la main sous la lampe pour que celle-ci s’allume seule.
Critère 4
Le temps de polymérisation
Le temps de séchage dépendra de la puissance de la lampe choisie; suivez bien les conseils de catalysation de la marque avec laquelle vous travaillez !
Pour exemple, une lampe UV 36W pourra durcir votre gel en 2min seulement, mais si vous choisissez une lampe de puissance 18W il faudra laisser catalyser 2 à 3x plus longtemps sous la lampe.
Votre appareil doit être performant et proposer des temps de séchages rapides qui pourront être différents selon le type de gel et de lampe:
- Gel UV: 2 minutes
- Gel LED: 30 secondes
- Vernis permanent avec une lampe UV 36W: 2 minutes
- Vernis permanent avec une lampe LED 48W: 30 secondes
Sécurité des lampes à manucure
Il est bon à savoir que les lampes UV sont sûres et sans danger, tant que nous les utilisons dans les bonnes conditions en salon de manucure. Ces lampes pour ongle sont filtrées afin de ne laisser passer que les longueurs d’onde UV-A les plus sûres, filtrant toutes les longueurs d’onde UV-A les plus inquiétantes. Aucun UV-B ou UV-C n’est utilisé pour faire durcir les poses d’ongle.
La faible intensité des UV émis, associée au filtrage des mauvaises ondes, permet de confirmer que ces lampes pour ongles sont considérées comme plus sûres que la lumière du soleil. Il faudrait qu’une cliente laisse ses mains sous la lampe UV pour ongles la plus puissante pendant deux heures pour que sa peau commence à rougir.
Notez toutefois qu’il est dangereux de regarder directement la lumières qui est produite par toutes les lampes dégagent des UV. Tenez à l’écart les enfants lors de l’utilisation de ces lampes professionnelles.
Pour votre sécurité et celles de vos clientes, optez pour des lampes de fabrication européenne aux normes européennes.
Vous avez maintenant les bonnes informations pour pouvoir vous diriger vers le modèle de lampe qui vous correspond le mieux.

Le dissolvant est un incontournable de la manucure classique. Il permet de retirer le vernis à ongles classique. Très efficace pour le vernis mais très odorant ! Pour manier cette petite bouteille, il faut se munir de cotons, de cotons-tiges et d’une petite brosse.